Hallo Ihr Lieben,
mein letzter Post ist zwar schon eine Weile her, aber nach einer Zwangspause bin ich nun mit frischem Elan und kreativen Einfällen zurück . 🙂
Obwohl es bei mir immer noch ziemlich turbulent zugeht, habe ich mir vorgenommen zu mindest zweimal im Monat einen Artikel zuschreiben. Sonntag in 14 Tagen schaut Ihr hoffentlich wieder vorbei.
Danke für Eure Geduld und liebe Karin, Danke für die Genesungswünsche,
Eure Kerstin
Hello everybody,
it’s been quite a while since my last article, but after a forced break I’m back with a vengeance. 🙂
Though my life is still upside down, creativity hit me finally again and I ‚m planing to do a post twice a month. Hope you will visit me again on Sunday in two weeks.
Thanks for your patience and dear Karin, thank you for the get well wishes,
Your Kerstin

Werkzeug / Tools
- Bleistift / pencil
- Skalpell / scalpell
- Lineal / ruler
- Geodreieck / set square
- Sprühkleber / spray adhesive
- Klebestift / glue stick
- Schere / scissors
Material / Material
- Stoffzuschnitte / fabric pieces (1) 9x 7 cm, (1) 8×6 cm, (1) 6×4 cm
- 2 Stücke Graupappe / 2 pieces of card board 7×5 cm
- 1 Stück Transparentfolie / 1 piece of transparency film 6×4 cm (1 Stückchen Folie aus einer Blisterverpackung geht auch/ a piece of blister pack will work too)
- 1 Stück Schaumstoff/ 1 piece of foam 7x 5 cm
- 2 kleine Magnete 1,5 cm Durchmesser / 2 small magnets 1, 5 cm in diameter
1.) Die inneren Linien des Rahmens auf eines der Stücke Graupappe zeichnen. Der Rahmen soll eine Breite von 1 cm haben. / Mark the inner lines for the frame on one of the pieces of card board. Measure 1 cm from each side.
2.) Auf die Rückseite der Pappe nun das Stück Schaumstoff kleben. Hierfür den Klebestift benutzen und anschließend alles gut trocknen lassen. / Turn the card board around and glue the foam onto it, using the glue stick. Let the glue dry thorougly
3.) Nun den inneren Teil des Rahmens herausschneiden und anschließend den Rahmen leicht mit Sprühkleber besprühen. Anschließend den Rahmen mittig auf das 8×6 cm große Stoffstück kleben. Den Stoff dabei nur ganz vorsichtig andrücken, weil der Sprühkleber alles gut durchweicht und der Schaumstoff sonst plattgedrück wird. / Cut out the inner part of the frame with the scalpell and glue the frame onto the fabric (8x 6 cm) using spray glue. But be carefull don’t put to much pressure on the foam when you stick the frame to the fabric. The spray glue tends to soak the foam pretty good and it will also stop the foam going back to fluffy.
4.) Den Kleber 1-2 Stunden trocknen lassen. /Let the glue set for at least 1-2 hours.

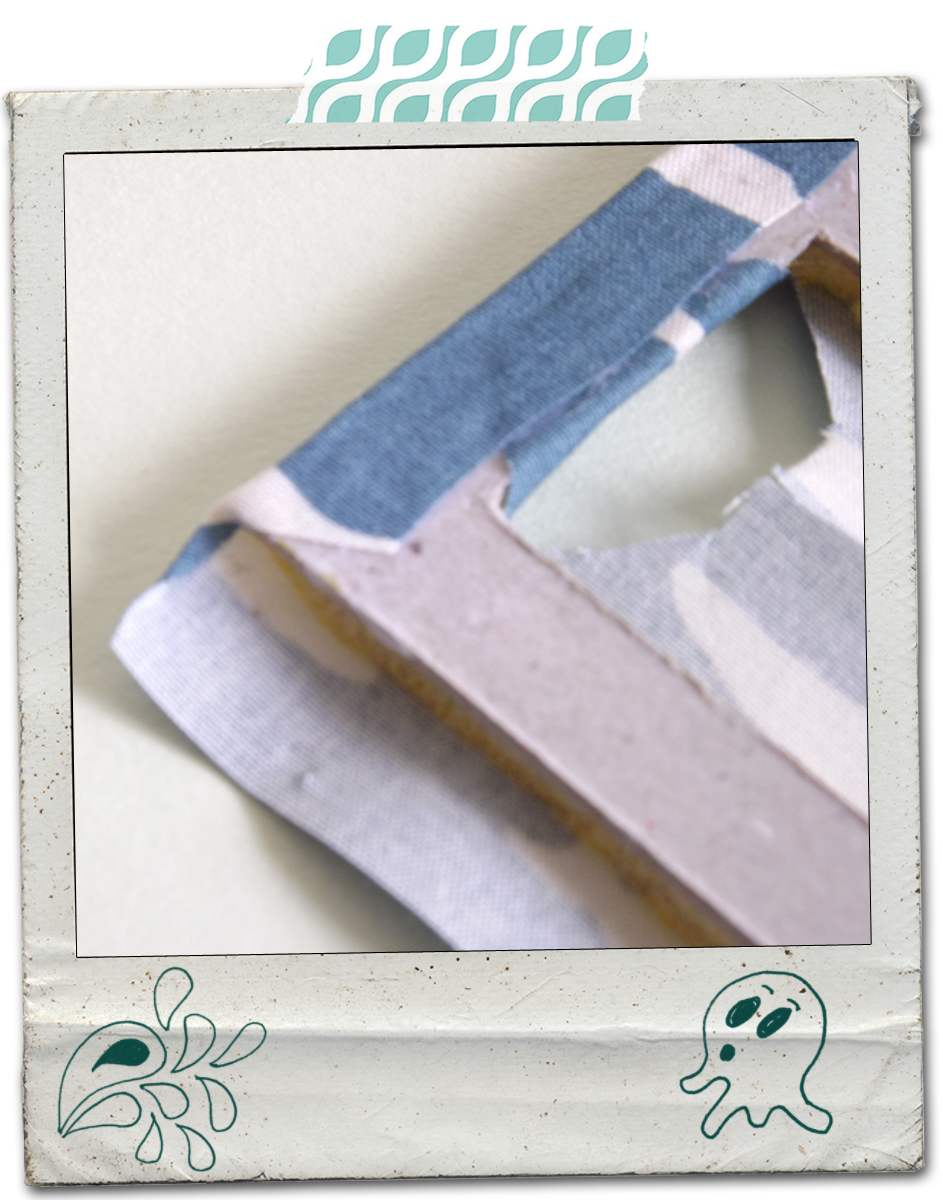
5.) Den Stoff innerhalb des Rahmens einschneiden , die Ecken kürzen und auf den Stoff auf der Rückseite des Rahmens mit Kleber befestigen (siehe Foto unten). / Cut the fabric inside the frame, trimm the corners and attach the fabric to the back of the frame with adhesive (see below).
6.) Auf das zweite Stück Graupappe werden nun die 2 Magnete geklebt, dann wird das Ganze mit Kleber bestrichen und mit Stoff bezogen. / Now glue the two magnets on the second piece of gray cardboard, then coate the whole thing with adhesive and cover it with fabric.

7.) Den Stoff an den Ecken zurecht schneiden und umschlagen, mit dem letzten, kleinsten Stückchen Stoff die Pappe beziehen und schon ist der zweite Teil des Rahmen fertig. / Trimm the fabric at the corners and glue it inwards onto the cardboard , cover the cardboard with the last smallest piece of cloth and now the second part of the frame is finished.
8.) Auf die Rückseite des ersten Teils wird nun die Folie geklebt. / Glue the piece of transparency film on the first element of the frame.

9.) Die beiden Teile des Rahmens können nun verbunden werden, hier für wird Kleber L-förmig auf dem Rahmen aufgetragen (siehe gelbe Markierung im unteren Foto). Anschließend die Bauteile aufeinader legen und kurz andrücken. Fertig! / Now the two parts of the frame can be connected, here for appy glue L-shaped to the frame (see yellow highlight in the bottom photo). Then place the components onto each other, press shortly and your done.

Resteverwertung / Exploiting leftovers
Aus den Rahmeninnenstücken und Stoffresten lassen sich ebenfalls süße kleine Magnete bauen. Dazu einfach den Karton quadratisch zuschneiden, die Schaumstoffseite mit Kleber besprühen, kurz warten und dann das Ganze mit einem Stückchen Stoff beziehen. Zum Schluss auf der Rückseite noch einen Magneten befestigen und alles gut trocknen lassen.
You can also build cute little magnets from the leftovers using the inside of the frame and scraps of fabric. Simply cut the cardboard square, spray the foam side with glue, wait a few minutes and then cover the whole thing with a piece of cloth. Attach the fabric on the backside and finally adhere a magnet. Let everything dry thoroughly before using the magnets.