Stempel Mekka & New in my bookcase

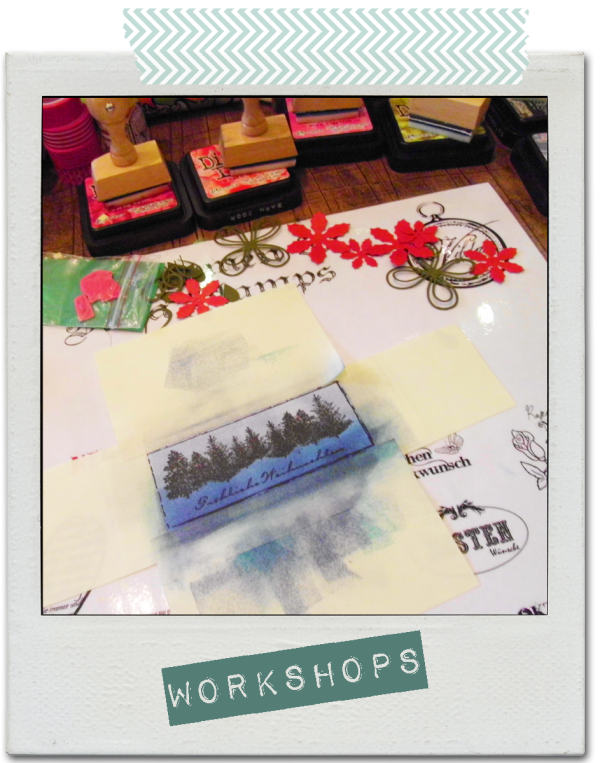
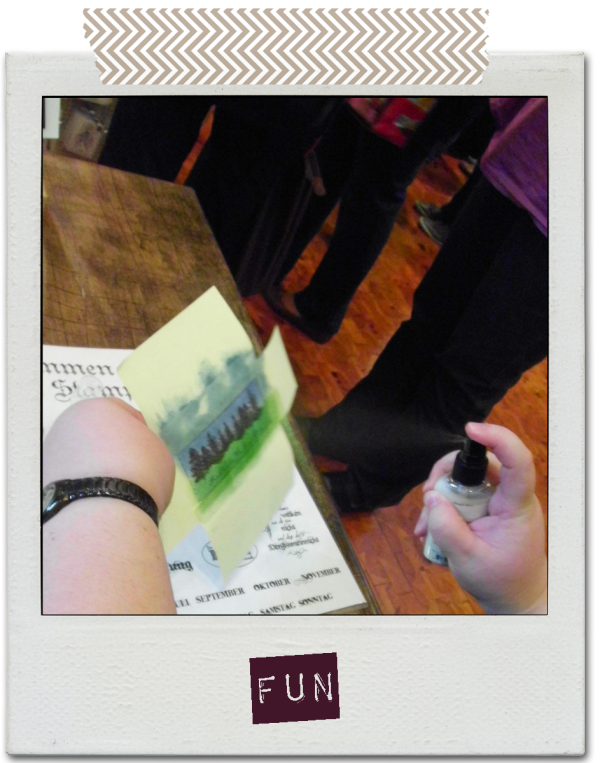
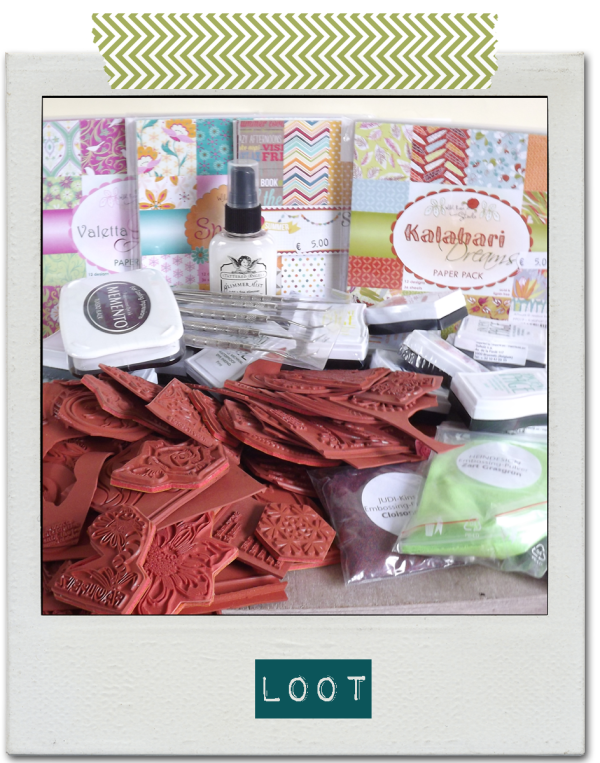
Am letzten Wochenende fand in Hagen das Stempel Mekka 2013 statt, und weil es bis dort hin nur ein Katzensprung ist, sind wir (der weltallerbeste kleine Schwester & ich) da mal schnell hingedüst. Es gab eine Menge schöner Dinge zu bestauen und wir sind schnell fündig geworden. Hier sind ein paar Eindrücke und unsere schönsten Beutestücke.

 Last weekend, the stamp Mecca in 2013 was held in Hagen, and because it is only a stone’s throw from there, we (the world’s best little sister & me) jetted off to the convention. There were a lot of nice things to bestauen and we have quickly found it. Here are a few impressions of the convention and our loot.

stemp-mekk2

stempmekk1 Kopiestempmekk4 Kopie

stempmekk5 Kopiestempmekk6 Kopiestempmekk10 Kopie

stempmekk8 Kopie

Nach 4 wilden Stunden im Stempel Mekka mussten wir natürlich gleich mal unserer lieben Mama von dem Großeinkauf berichten. / After 4 wild hours spend at the convention we had to tell our lovely Mama all about the bulk purchase.

Mam: „Wie war’denn? Habt ihr was Schönes gekauft?“ / „How was it? Did you bought something nice?“

Anke: “ Ich habe 43 Stempel gekauft.“ / „I bought 43 stamps.“

Kerstin: „Also ich habe 29, das macht dann ……………………………71 Stempel insgesamt.“ / „So I have 29, which makes then …………………………… 71 stamps in total.“

Mam: „71?!!!!!  Ihr seid ja verrückt!“ / „71!? You’re crazy!“

Beide: „Nein gar nicht, die waren ja alle so billig.“ / Both: „No, are not, they were all sooo inexpensive. 

Anke: „Die waren mindestens dreimal billiger als im Laden.“/ „They were at least three times cheaper than in stores.“

Mam: „Ich wusste schon immer, dass ich Euch beide zu heiß gebadet habe.“ / „I always knew I bathed you too hot when you were kids.“ (= german idiom for „you’re nuts“ or like „dropping someone on their head to offen“)

[… es folgt eine rege Diskussion über den Verfall der Sitten im Allgemeinen und exzessives Stempel-kaufen im Besonderen… / … followed by a lively discussion about the decline of morals in general and excessive stamp purchase in particular … ]

New In My Bookcase

Anlässlich des Stempel-Mekkas möchte ich Euch heute ein Buch vorstellen, das sich seit ein paar Wochen in meinem Bücherregal tummelt. Es ist von Meagan Lewis und heißt „Stempel Liebe“. In 4 Kapiteln erklärt Meagan wie man verschiedene Druck- und Stempeltechniken nutzt. Die Techniken werden in 20 verschiedenen Projekten umgesetzt, deren Themen von Dekorieren bis Ordnung schaffen reichen. Die Projekte sind übersichtlich und ansprechend, so dass sich vor allem Anfänger über dieses kleine Sammelsurium freuen dürften, für fortgeschrittene Stempelschnitzer enthält das Buch nichts Neues, aber die Aufmachung und die Projekte bieten eine Menge Inspiration für eigene Idee. Besonders gut an dem Buch gefällt mir der Grundlagenteil, in dem Meagan Lewis die verschiedenen Möglichkeiten und Eigenschaften von Druckfarben und Materialien beschreibt, auch kommen Tips zur Stempelpflege und eine SOS-Stempelhilfe nicht zu kurz. Neulich habe ich auch Ihren Onlineshop Brown Pigeon auf etsy gefunden, in dem sie fertig Stempel und noch einiges mehr verkauft.

On the occasion of the Stamp Mekka 2013 I want to present a book to you that actually hangs out in my bookcase for a few weeks. It is by Meagan Lewis and it’s called „put your stamp on it.“ In 4 chapters Meagan explains how to use various printing and stamping techniques. The techniques are implemented in 20 different projects, ranging from to decorating to organizing. The projects have a clear structured instructions and  have a appealing desing.  I can recommend this little hodgepoge of creativity for Beginners, though the book does not spread knew knowledge for advanced stamp carver, but the presentation and the projects offer a lot of inspiration for your own idea. My favorite part of the book ist Meagan’s despription of the stamping basics, as properties and range of printing inks and materials or tips for care and troublshooting.  Recently I discoverd Meagan’s online shop Brown Pigeon on etsy, where she sells ready made stamps and more. 

stempmekk7 Kopiestempmekk9 Kopie

P.S.:  Don’t forget, next post on Sunday 6th October.
Love Kerstin

Schneeflöcken, Weißröckchen… / Dancing Snow-flakes, White-lace flowers…

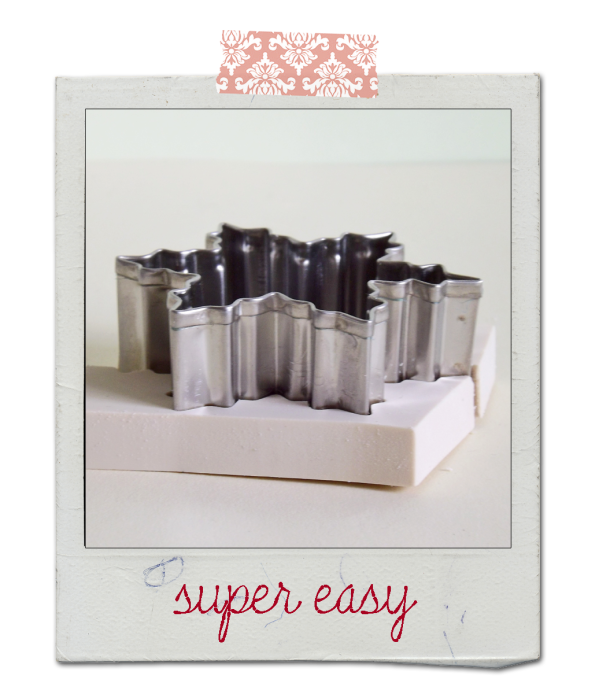
cookiecutter Kopie Na, wie sieht’s aus, habt Ihr schon alle Geschenke für Eure Lieben beisammen? Nun,ich muss noch die Geschenke für meine Schwester und meine Mutter kaufen, aber das Geschenk für meinen Vater könnt Ihr schon auf dem Foto bewundern. Natürlich werde ich noch nicht verraten was drin ist, nur für den Fall der Fälle. Was ich Euch heute wirklich zeigen möchte ist, wie man ganz schnell einen tollen Stempel mit Hilfe von Plätzchenaustechern zaubern kann.

So, how about the christmas gifts for all your loved ones, do you got everything already? Well,  I still need to buy some gifts for my sister and my mother, but the gift for my father, you can already admire in the photo.  Of course I will not tell what’s inside, just in case my Dad keeps on snooping around.  What I really want to show you today, is how to creat a great stamp with cookie cutters in no time.

cookiecutter -material

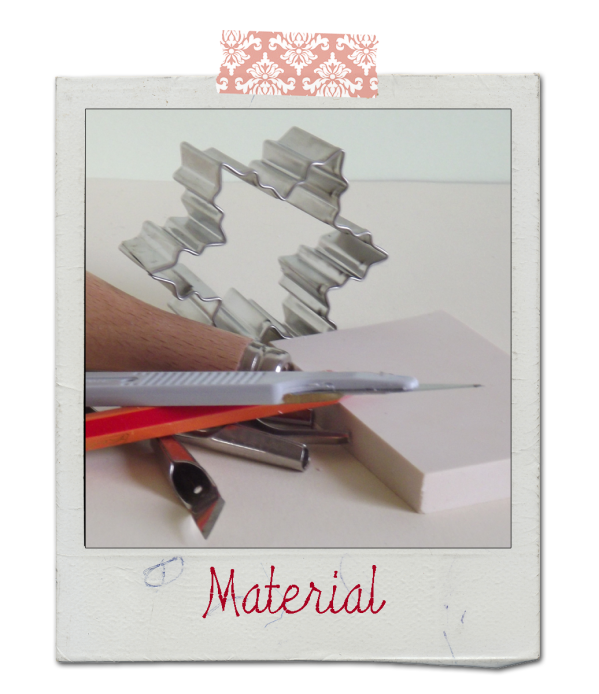
1.) Das Material zusammenstellen.  Ihr braucht ein Plätzchenaustecher, einen print block für  Gummistempel, Linolschnitzwerkzeug, einen Bleistift und Papier zum Bedrucken.

Gather your material. You need a cookie cutter, rubber print block, linoleum cutting tools, a pencil and some paper to print on.

2.) Das Förmchen auf dem Gummmiblock platzieren und  die Grundform des Stempels ausstechen, in dem Ihr das Förmchen fest in den Printblock drückt.

Place the cookie cutter onto the printing block and now cut out the basic form of the stamp by pressing the cutter firmly into the printing block.

cookiecutter-cutting3.) Weitere Muster mit einem Bleistift aufmalen und mit dem Linolmesser herausschnitzen.

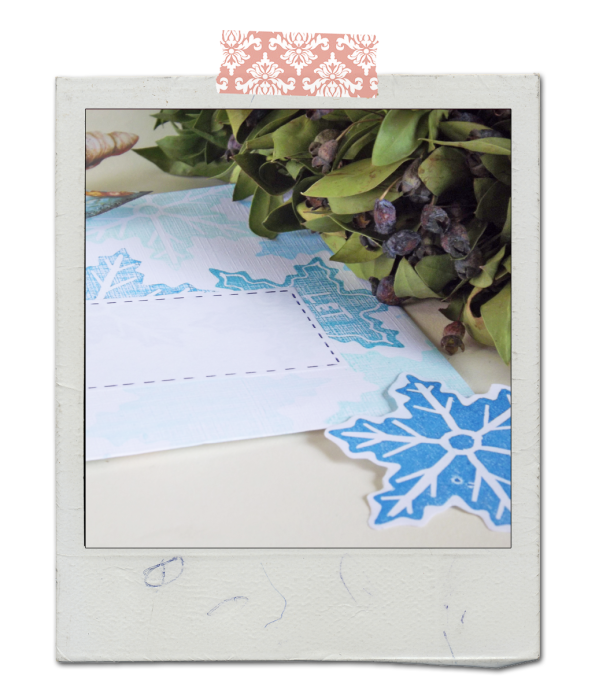
Draw more details on the stamp and carve them out.cookiecutter snowflake 4.) Stempel drauf los und fertige mit dem Stempel Anhänger, Geschenkpapier, weihnachtliche Briefumschläge und Briefpapier, …

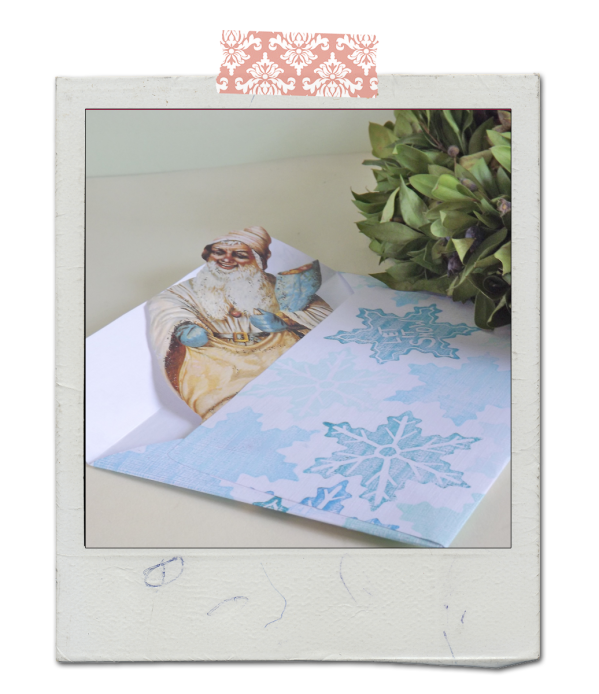
Start printing and make tags, wrapping paper, Christmassy stationery,…

cookiecutter envelope cookiecutter parcel cookiecutter santa

DIY: Matroschka – Stempel / Matryoshka – Stamp

Wer kennt Sie nicht, die niedlichen kleinen Matroschkas, die sich wie durch Zauberhand vermehren können. Ich liebe diese Puppen seit ich ein kleiner Dreikäsehoch war, aus diesem Grund gibt es heute, weil es so schön zum Thema Vilnius passt, ein kleines Stempel-Tutorial für Matroschka-Püppchen.  Viel Spaß.

Who does not know, the cute little matryoshkas (russian nesting-dolls), which can multiply themselves as if by magic. I love these dolls since I was a little midget and because of this and in the spirit of Vilnius, I made a little tutorial for nesting-doll-stamps.  ENJOY

  • 1 Stück Factis Print Block , bzw. Stempelgummi
  • Linolschnitz-Werkzeug
  • 1 weichen Bleistift (2 B oder weicher)
  • 1 Skalpell
  • Vorlage bzw. Ausdruck auf DIN A 5 Papier Matroschka-Templates
  • 1 Falzbein, alternativ 1 Teelöffel
  • 1 piece Factis Print block or rubber stamp
  • Carving tools / linoleum cutters
  • 1 soft pencil
  • 1 scalpel
  • Template or print of this Matryoshka-Template on A5 paper
  • 1 bone folder, alternatively 1 teaspoon

  1. Motiv-Vorlage mit Bleistift nachzeichnen
  2. Motiv mit der nachgezeichneten Fläche nach unten auf das Stempelgummi legen. Mit dem Falzbein kräftig über die Vorlage rubbeln, durch das Rubbeln übertragen sich die Bleistiftkonturen, praktischerweise gleich spiegelverkehrt.
  3. Auf dem Print Block sollte die Zeichnung nun gut zu erkennen sein, so dass man sich ans Schnitzen machen kann. Mit dem kleinen Geißfuß (v-förmige Klinge) werden zunächst die inneren Konturen herausgearbeitet.  Mit dem Hohleisen (u-förmige Klinge) werden dann größere Flächen heraus geschnitzt. Zuletzt die äußeren Konturen ausarbeiten.
  4. Schnitte mit dem Skalpel nachbearbeiten und die Ränder des Stempels abschneiden. Das Gesicht schneide ich gerne auf einem eigenen kleinen Block zu, weil ich es dann später für verschiedene Matroschkas benutzen kann und das Einfärben so sehr viel leichter ist.
  5. Einen Probedruck machen und nach Bedarf den Stempel nachbearbeiten.
  6. Fertig. Hier noch ein paar Tipps was sich damit alles so bestempeln lässt, z.B. Briefe, Umschläge, Sticker, Geschenkpapier, …..
  1.  Trace the lines of the template with a pencil
  2. Lay down the Motif with the surface down on the rubber stamp. Rub vigorously with the bone folder on the paper. During the rubbing process, the pencil contours will be transferred onto the printing block, conveniently reversed.
  3. Now the drawing should be pretty visble on the block,  so that you can get down to the carving part. First you need to re-cut the inner contours with the small goutweed (v-shaped blade).  With the gouge (u-shaped blade) carve out larger areas. Finally, you can cut out the outer contours.
  4. Trim the cuts with the scalpel and cut off the edges of the stamp. I like to cut the face separatelyon an extra  block, because then I can use it for various matryoshkas and also the coloring is so much easier.
  5. Do a test print and if necessary reprocess the stamp.
  6. Done. Here are a few stamping tips, make your own stationery, stickers, wrapping paper, …..

Und zum Schluss noch ein kleine „Free-style-Version“.

And last but not least a little „free-style version“.

THINK MONDAY – think „NEST“

Tja, was soll ich sagen, mir fehlte immer noch eine kleine Frühlings-Karte. Ich denke, dieses Problem hat sich hiermit erledigt. 😉

What can I say, I was still low on little spring- greeting cards. Guess I’m not anymore. 😉
 

Wenn ich dieses ATC „nachbauen“ möchte…?

(mehr …)

THINK MONDAY

Es ist mal wieder THINK MONDAY und das Thema lautet dieses mal „Eier“. Zunächst dachte ich daran eine nette kleine Karte für Ostern zumachen, aber bei meiner diesjährigen digitalen Eiersuche bin ich auf die Ei-Replik des Riesenalk gestoßen. Riesenalk? Noch nie davon gehört? Tja, ich auch nicht. Neugierig wie ich nun einmal bin, habe ich eine kleine Recherche gestartet und diesen tollpatschigen, süßen „Pinguin“ entdeckt, der in Europa und dem Rest der nördlichen Hemisphäre lebt. Freilebende Pinguine in Europa?  Hurra, endlich keine zeitaufwendigen Reisen mehr zum Südpol! Ich war kurz davor meine Polarausrüstung auf dem nächsten Flohmarkt zu verkaufen, als mir ein kleiner Haken an der Sache auffiel.  Es gibt keinen lebenden Riesenalk mehr. 100.000 Jahre lang war der Riesenalk eine beliebte Quelle für Nahrung, Eier und Daunenfedern, bis er schließlich ausgerottet war. Das wirklich traurige daran, neben dem Pech doch keine Pinguine in der Nachbarschaft zu haben, ist die Tatsache, dass die Ausrottung hätte verhindert werden können. Als eine Gefährdung der Art festgestellt wurde, waren Sammler und Museen so versessen darauf Haut für Ausstellungsstücke zu bekommen, dass die Jagd auf diese Tiere noch schlimmer wurde. Am 3. Juli 1844 fand man auf Geirfuglasker (Island) das letztes Paar Riesenalke und tötete es. Jón Brandson und Sigurður Ísleifsson erwürgten die brütenden Altvögel, während Ketill Ketilsson das Ei mit den Füßen zertrat. Nachdem ich all das erfahren habe, war mir nicht mehr so sehr nach lustigen Osterkarten…

So it’s THINK MONDAY again. Today’s challenge theme: „eggs“. First I thought about doing a nice little card for the upcoming holidays, but while searching for some graphics I stumbled over a replicate of the great auk’s egg. The great auk? Never heard of? Well, I didn’t either. Being curious as usual I started a little research and discovered that awkward, cute „penguin“ living in Europe and almost the rest of the northern hemisphere. That kept me thinking…Penguins living in Europe? Hooray, no more time consuming expeditions to the south pole! I was just about selling my polar equipment at the next jumble sale, when I noticed there is a minor hatch. The great auk had been hunted down to it’s full extinction. For more than 100.000 years it had been a source for eggs, food and down feathers. The saddest thing is, besides not having penguins in the neighborhood, is that it could have been prevented.  When the endangerment was noticed, the hunting parties even got worse due to the greed of collectors and natural history museums. Finally the last pair, found incubating an egg, was killed on Geirfuglasker (Iceland) on 3. July 1844.  Jón Brandsson and Sigurður Ísleifsson stragnled the adults and Ketill Ketilsson smashed the egg with his boot. After knowing this, I was no longer able to do a „picturesque “ card…
 

THINK MONDAY ATC

… and a different version I made, while being inspired.


Like this card? Please share and you can also download the file (for private use only):

Download  „The great auk“

Das Februar „Kunst-Stück“

Was soll ich sagen, wenn man erstmal auf den Geschmack gekommen ist, fällt es schwer mit dem Stempel-Schnitzen aufzuhören….

What can I say, I just couldn’t stop carving rubberstamps. So here is another simple print…


Das Januar „Kunst-Stück“

Meine erste Karte ging, wie sollte es anders sein, an die beste kleine Schwester der Welt (man, hab ich ein Glück).  Hier nun das „Januar-Kunst-Stück“:

Das Experiment lag in diesem Fall weniger in dem Motiv, denn mehr in der Herstellung des Stempels.

So this is my first card, expectedly I send it to the world’s best little sister (I’m so lucky to have her). 
I always was so keen on having owl stamp, but I wasn’t really comfortable with the finished products. So I bought some rubber-stamp-material an started out carving one.